
How to Dehumidify a Attic?

The easiest way to dehumidify an attic is to install a good dehumidifier designed for attic spaces. These units remove excess moisture from the air, preventing mold growth and protecting your home’s structure. It’s a simple, effective solution for a common problem.
A damp attic can cause more trouble than you might think. High humidity can lead to wood rot, damaged insulation, and even serious structural issues over time. Many homeowners find that dealing with attic moisture is essential for their home’s long-term health and comfort. We found that addressing this early saves a lot of headaches.
- Install a dedicated attic dehumidifier.
- Ensure proper ventilation for air circulation.
- Check for and fix any roof or plumbing leaks.
- Seal air leaks between your living space and the attic.
Let’s walk through the best ways to tackle that damp attic air and make sure your home stays dry and healthy. We’ve gathered some easy-to-follow steps for you. Our guide explains how many dehumidifiers you might need for your home.
Tackling Attic Moisture: Your Guide to a Drier Space
So, you’ve got a damp attic. Don’t worry, this is a pretty common issue! We found that a moist attic isn’t just uncomfortable; it can actually damage your home. Think wood rot, mold, and weakened insulation. But the good news is, you can fix it. Let’s get that attic dry and healthy.
Understanding Attic Humidity: Why It Happens
Attic humidity can sneak up on you. Your home naturally produces moisture. Things like cooking, showering, and even breathing all add water vapor to the air. Normally, your home’s ventilation handles this. But attics can be tricky. They often lack proper airflow. This traps moisture. We found that attics can be 15 degrees warmer than the rest of your house. This temperature difference can cause condensation. That’s like dew forming on a cold glass on a summer day. This condensation is a prime culprit for attic dampness.
Sources of Attic Moisture
Where does all this extra water come from? It’s usually a few key places. Your living space is a big one. Warm, moist air from your home can leak into the attic. This happens through tiny gaps and openings. We found that even small cracks can let a surprising amount of humid air escape. Plumbing in or near the attic can also be a source. Leaky pipes or condensation on ductwork add moisture. And, of course, any issues with your roof can let in rain or snow. Even seemingly small roof leaks can make a big difference over time.
The Risks of a Humid Attic
A damp attic is a breeding ground for problems. Mold and mildew love moist environments. They can start growing on wooden beams and other materials. This isn’t just unsightly; it can affect your indoor air quality. Mold spores can travel through your home. Some people are sensitive to them. We’ve seen reports (CDC) linking mold exposure to respiratory issues. Beyond mold, excessive moisture weakens wood. This can lead to structural damage over the years. Insulation also suffers. Damp insulation loses its effectiveness. This means your home is less energy-efficient. You might see higher energy bills. Your heating and cooling systems work harder.
The Best Solution: Installing an Attic Dehumidifier
When it comes to directly combating humidity, a dehumidifier is your champion. It actively pulls moisture from the air. We found that dedicated attic dehumidifiers are built tough. They are designed for the temperature fluctuations and conditions found in attics. These units collect water in a tank or can drain it away continuously. This keeps the humidity levels in check. It’s like giving your attic its own personal air dryer.
Choosing the Right Dehumidifier
Not all dehumidifiers are created equal. For an attic, you want one that’s up to the task. Look for models specifically rated for larger spaces. You’ll also want to consider its “pint capacity.” This is how much water it can remove in 24 hours. A general rule is to aim for a pint capacity that matches or exceeds the square footage of your attic. Many experts say you should also check the unit’s “low-temperature operation.” Some dehumidifiers stop working if it gets too cold. Attics can get chilly, especially in winter. You need a unit that can handle it. Energy efficiency is another factor. Look for the ENERGY STAR label. These units use less electricity.
Placement is Key
Where you put the dehumidifier matters. You want it to be able to pull air from the entire attic space. Ideally, place it somewhat centrally. Avoid tucking it away in a corner. Make sure it has good airflow around it. Don’t block the intake or exhaust vents. You’ll need a power outlet nearby. If you’re draining it into a sink or sump pump, ensure the drain hose reaches comfortably. We found that some homeowners use a condensate pump to move the water if the unit isn’t near a drain.
Drainage Options
How will you get rid of the collected water? Most attic dehumidifiers offer two main options. You can use the built-in collection tank. This is simple, but you’ll have to empty it manually. How often depends on how much moisture the unit is removing. Some tanks can hold several gallons. The other option is continuous drainage. This usually involves connecting a hose. The water can drain directly into a floor drain, a condensate pump, or even outside if permissible and practical. Continuous drainage is more convenient. It means the dehumidifier can run without interruption. We found that many people prefer this for ease of use.
Don’t Forget Ventilation: The Unsung Hero
While a dehumidifier tackles moisture head-on, good ventilation helps prevent it from building up in the first place. It’s like having a good defense alongside a strong offense. Proper attic ventilation allows moist air to escape. It also brings in drier outside air. This helps regulate temperature and humidity.
Types of Attic Ventilation
There are a few common types of attic vents. Soffit vents are located under the eaves. They let fresh air in. Ridge vents run along the peak of your roof. They let warm, moist air out. Gable vents are on the vertical walls at the ends of your attic. Many homes have a combination of these. We found that having balanced ventilation is ideal. This means a good ratio of intake to exhaust vents. This creates a continuous airflow through the attic.
Assessing Your Current Ventilation
Take a peek up into your attic. Do you see vents at the eaves? Are there vents near the roof peak? Do you have gable vents? If your attic feels stuffy or you see signs of moisture, your ventilation might be insufficient. Sometimes, insulation can block vents. You might need to clear that out. If you have very few vents, you might consider adding more.
Improving Airflow
If your ventilation seems lacking, there are ways to improve it. Ensure insulation isn’t blocking any existing vents. You can add more soffit vents or ridge vents. A professional can assess your attic’s needs. They can recommend the right type and number of vents. Sometimes, a powered attic fan can help. It actively pulls air out of the attic. However, these should be used carefully. They can sometimes create negative pressure. This can pull conditioned air from your living space into the attic. We found that passive ventilation is often preferred.
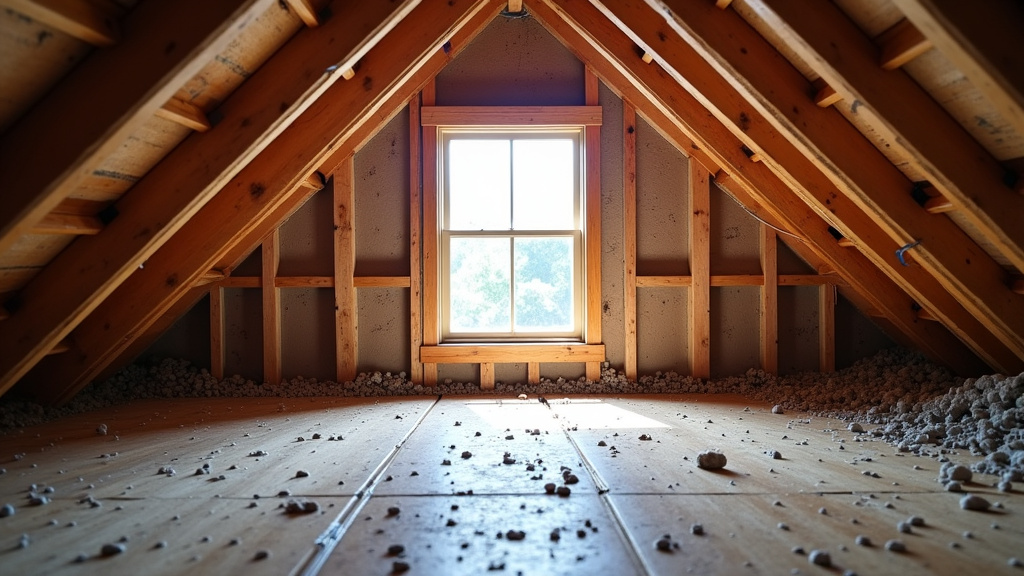
Fixing Leaks: Stop Water at the Source
A dehumidifier can handle moisture in the air. But it can’t fix water actively leaking into your attic. This is a critical step many homeowners overlook. If you have a leak, the dehumidifier will just be fighting a losing battle.
Roof Leaks
The most obvious place for water to enter is your roof. Damaged shingles, flashing issues around chimneys or vents, or ice dams in winter can all cause leaks. Look for water stains on the underside of the roof decking. You might see drips. If you suspect a roof leak, it’s best to call a roofing professional. They can pinpoint the exact problem and repair it. Catching these early saves a lot of potential damage.
Plumbing and HVAC Leaks
Check any exposed plumbing in your attic. Are there any drips or corrosion around pipes? If you have HVAC ductwork running through the attic, inspect it. Leaky ducts can also release moist air. Condensation can form on cold duct surfaces, dripping water. Ensuring your pipes and ducts are well-sealed and insulated is important.
Sealing Air Leaks: Your Attic’s Defense Layer
Remember how we talked about air leaking from your living space? Sealing these leaks creates a barrier. It keeps your home’s conditioned air where it belongs. It also stops humid air from entering the attic.
Common Leak Points
Where should you look for these leaks? Think about areas where different materials meet. Around plumbing vents that pass through the attic floor. Electrical wiring penetrations. Chimney chases. Attic access hatches or pull-down stairs. Gaps where walls meet the attic floor (the top plate of the wall). We found that these are common entry points for unwanted air.
DIY Sealing Techniques
You can seal many of these leaks yourself. Use **caulk** for small gaps around pipes and wires. **Expanding foam sealant** is great for larger openings. For attic hatches, consider adding **weatherstripping**. You can also insulate the hatch itself. This makes it more airtight and thermally efficient. A **draft-stopping** material can also be used in wall cavities. We found that sealing these leaks can significantly reduce airflow into the attic.
Checklist for a Drier Attic:
- Install a dehumidifier suited for attic use.
- Ensure adequate and balanced attic ventilation.
- Inspect for and repair any roof leaks promptly.
- Check plumbing and HVAC components for leaks.
- Seal air leaks between your living space and the attic.
- Monitor humidity levels regularly.
Conclusion
Tackling attic humidity is a smart move for your home’s health. You’ve learned that installing a dedicated attic dehumidifier is your most direct solution. But remember, it works best alongside good ventilation and by fixing leaks. Sealing air gaps also plays a big part. By combining these strategies, you create a dry, healthy attic. This protects your home’s structure and your indoor air quality. Your next step? Assess your attic’s current condition and implement these proven methods to ensure lasting dryness.
Frequently Asked Questions
How often should I check the dehumidifier’s water tank?
You’ll need to check your dehumidifier’s water tank regularly, especially when humidity levels are high. Depending on the unit and your attic’s moisture, you might need to empty it every few days or even daily. Many units have an indicator light to let you know when it’s full.
Can I use a regular home dehumidifier in my attic?
While a regular home dehumidifier might offer some temporary help, it’s generally not recommended for attics. Attic environments can experience wider temperature swings and more extreme conditions than your living space. Dedicated attic dehumidifiers are built to handle these conditions and are often more energy-efficient for larger spaces.
What are the ideal humidity levels for an attic?
The ideal humidity level for an attic is typically between 30% and 50%. Maintaining levels below 50% helps prevent mold growth and condensation. Your dehumidifier should help you keep it within this healthy range.
Will sealing air leaks in my attic stop all moisture problems?
Sealing air leaks is a very important step in controlling attic moisture. It prevents humid air from your home from entering the attic. However, it’s not a complete solution on its own. You still need proper ventilation and potentially a dehumidifier to manage naturally occurring moisture and external sources.
How long does it take for a dehumidifier to dry out an attic?
The time it takes for a dehumidifier to dry out an attic depends on several factors. These include the initial humidity level, the size of the space, and the dehumidifier’s capacity. Consistent operation and addressing the other contributing factors, like ventilation and leaks, will speed up the process.
